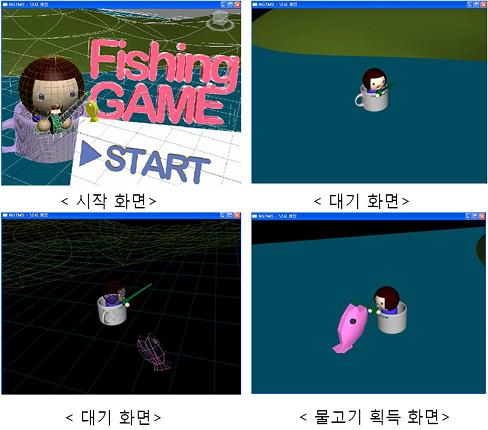
위 릴낚시 게임 – 위모트로 릴낚시의 “돌리는 모션”을 캡쳐하여 물고기를 낚는 게임
위 비행기 게임 – 위모트로 “3축 회전”을 감지하여 비행기의 움직임을 콘트롤하는 게임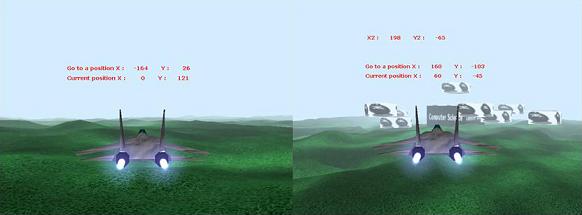
위 댄스게임 – 위모트로 “좌우상하의 움직임”을 감지하여 DDR(DanceDanceRevolution)같은 게임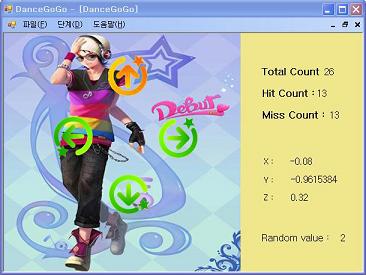
Tag Archives: Wiimote
Wiimote로 OSG 프로그램 콘트롤하기
Wiimote를 OSG 프로그램에 연동하기위해 다음과 같이 한다.
0. 하드웨어 준비하기 (위모트, 블루투스 동글)
1. WiimoteLib를 이용하여 Wiimote로 부터 데이터를 읽어들이고(블루투스->COM포트), 그 읽어들인 데이터를 Shared Memory (to local disk)나 UDP(to remote location)로 보내는 프로그램을 작성한다.
2. 기존의 OSG 프로그램에 Shared Memory나 UDP로 받은 Wiimote 데이터를 읽어들여서 OSG를 콘트롤 처리하는 OSG Manipulator 를 추가한다.
WiimoteLib을 이용한 간단한 프로그램
1. Download WiimoteLib from http://www.codeplex.com/WiimoteLib
2. WiimoteLib을 이용한 간단한 프로그램
// WiimoteLib Example
#include <iostream>
#import “../WiimoteLib/bin//x86/Release/WiimoteLib.tlb”
using namespace std;
using namespace WiimoteLib;
int main(int argc, char * argv[])
{
HRESULT hr = CoInitialize(NULL);
try
{
IWiimoteCOMServerPtr spWiimoteCOMServer;
hr = spWiimoteCOMServer.CreateInstance(
“WiimoteLib.WiimoteCOMServer”);
int count = 1;
while (!GetAsyncKeyState(VK_ESCAPE))
{
cout << “X : ” << spWiimoteCOMServer->GetX() << endl;
cout << “Y : ” << spWiimoteCOMServer->GetY() << endl;
cout << “Z : ” << spWiimoteCOMServer->GetZ() << endl;
cout << “Battery Status : ” <<
spWiimoteCOMServer->GetBatteryStatus() << endl;
Sleep(1000);
switch (count)
{
case 1:
spWiimoteCOMServer->SetLEDs(true, false, false, false);
break;
case 2:
spWiimoteCOMServer->SetLEDs(false, true, false, false);
break;
case 3:
spWiimoteCOMServer->SetLEDs(false, false, true, false);
break;
case 4:
spWiimoteCOMServer->SetLEDs(false, false, false, true);
break;
default:
spWiimoteCOMServer->SetLEDs(true, true, true, true);
count = 0;
break;
}
++count;
// 럼블 (진동) 키기
//spWiimoteCOMServer->ToggleRumble(true);
}
}
catch (_com_error& e)
{
cout << e.ErrorMessage() << endl;
}
return 0;
}

Wiimote를 컴퓨터에 연결하기
1. Hardware – Nintendo Wii Controller, Bluetooth Dongle를 구한다.
-설치가능한 Bluetooth Dongle List http://www.wiili.org/index.php/Compatible_Bluetooth_Devices
2. Bluetooth Dongle Driver를 설치한다.
3. Wiimote를 Bluetooth 장치 추가하기 한다.
-제어판 -> Bluetooth 장치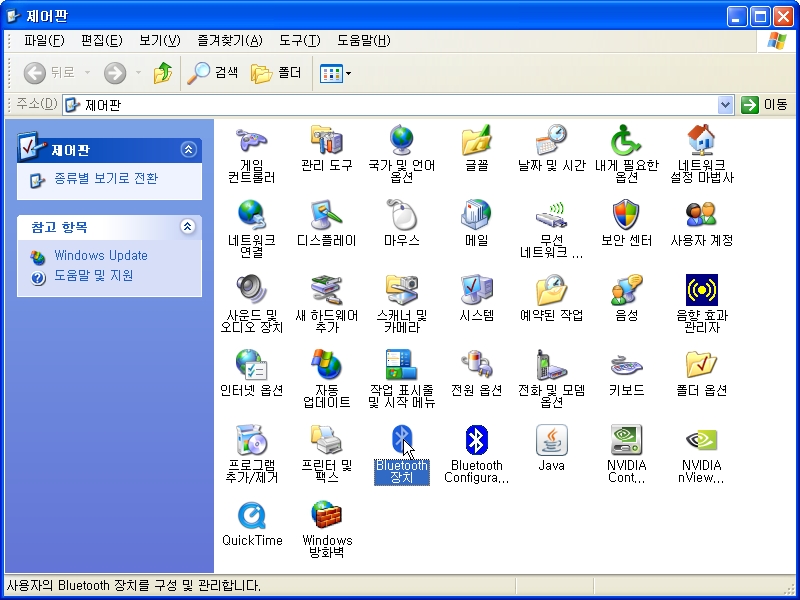
-Bluetooth 장치 -> 추가버튼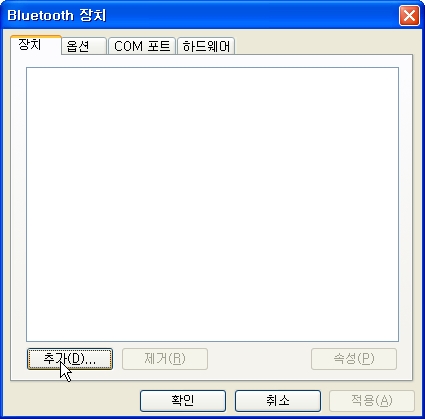
-Bluetooth 장치 추가 마법사 -> 위모트의 1,2번 버튼을 동시에 누르고 (아래쪽 LED 네개가 깜빡거리는데 연결이 성공 될 때까지 계속 누르고 있는다) “장치가 설정되었고 검색할 준비가 되어 있습니다.” 체크버튼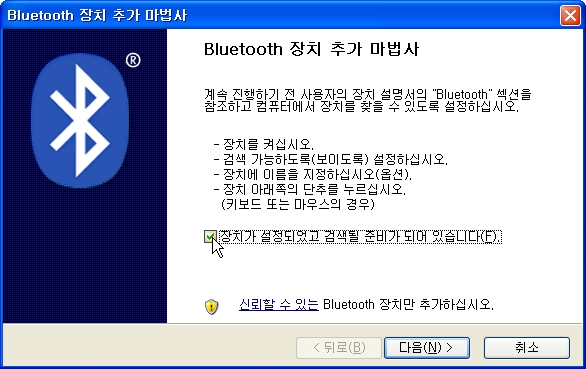
–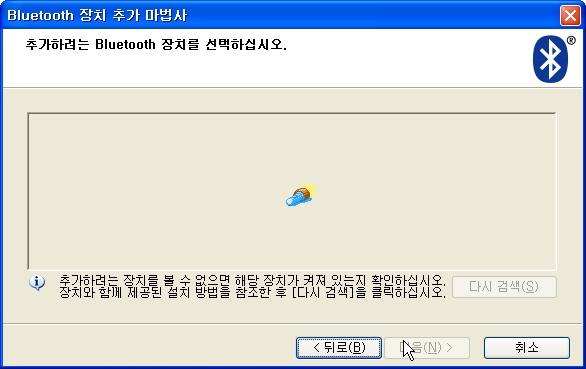 장치 탐색중
-위모트 장치(Nintendo RVL-CNT-01)가 나타나면 선택 후 다음버튼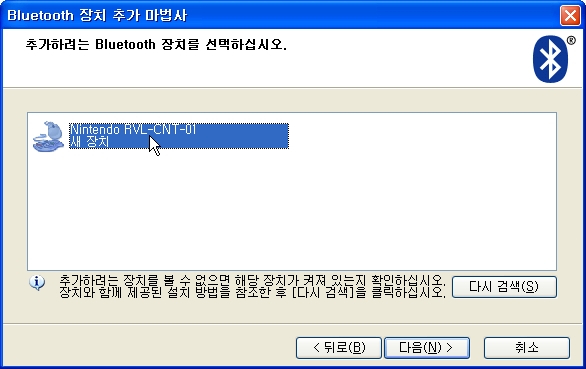
-장치의 “암호 키 사용 안 함”에 클릭후 다음버튼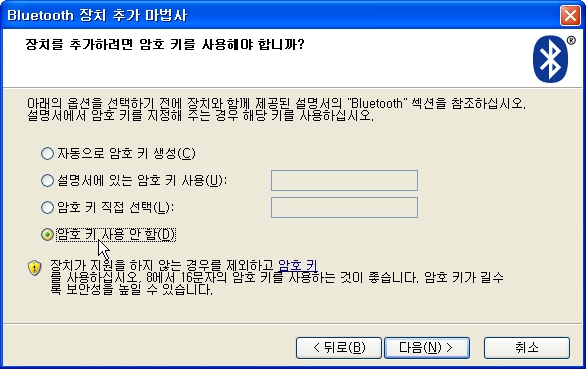
-Bluetooth 장치 설치 중…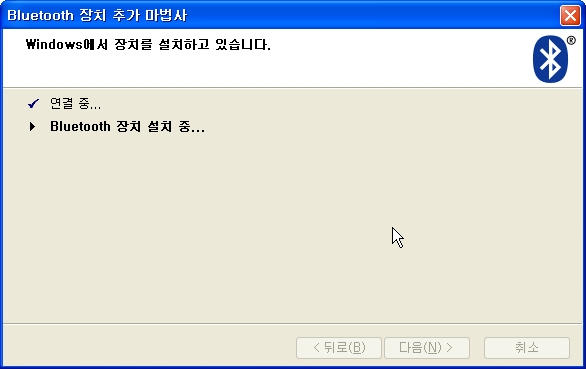
-추가가 잘 되고 나면, 마침버튼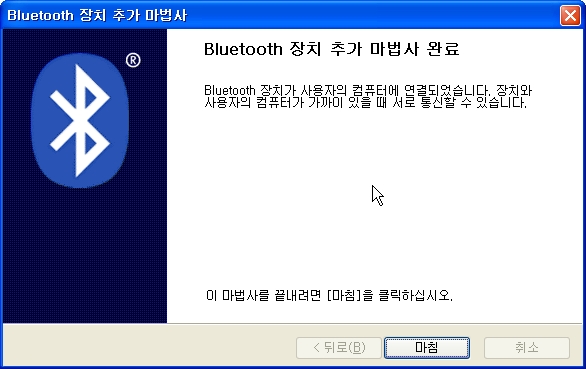
-연결이 완료되면 위모트의 1,2번 버튼을 누르고 있지 않아도 계속 깜빡인다.
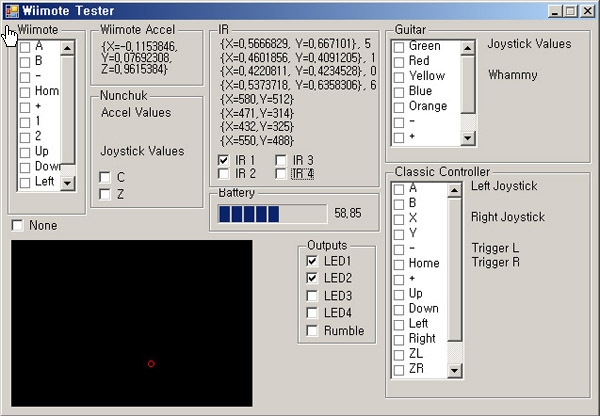
4. 간단한 Wiimote Test 프로그램으로 데이터가 잘 들어오는지 확인한다.
http://www.codeplex.com/WiimoteLib