lecture3
Month: March 2017
Lab2
Lab2-DirectoryImageConverter
java2-lab2-DirectoryImageConverter
Lab2_1~ Lab2_5 프로젝트 디렉토리 안에 모든 파일(src/*.java & bin/*.class)와 보고서 (2~3장)를 넣고 Lab2_학번_이름.zip 압축한 후 e-learning(http://lms.dankook.ac.kr/index.jsp)으로 제출
Lab2_1 – array(String[] commands), foreach, parameter passing
Lab2_2 – String, class
Lab2_3 – String substring 메소드, file/directory
Lab2_4 – BufferedReader 클래스 (“commands.ini”)
Lab2_5 – recursive call
lecture2
lecture2
lecture1
lecture1
Lab1 Review
import java.util.Scanner;
class Arithmetic {
public static int add(int n, int m) {
return n + m;
}
public static int divide(int n, int m) throws ArithmeticException {
return n / m;
}
}
public class Lab1 {
// 5.1 Scanner, user input
static int input1, input2;
static Scanner scan = new Scanner(System.in);
public static void getUserInput()
{
System.out.print(“Please enter [input1]: “);
input1 = scan.nextInt();
System.out.print(“Please enter [input2]: “);
input2 = scan.nextInt();
scan.nextLine();
}
// 5.2 get ‘q’-key
public static boolean getUserExitKey() {
System.out.print(“Press q-key to exit the program or enter-key to enter new user input: “);
String s = scan.nextLine();
if (s.contentEquals(“q”))
return true;
else
return false;
}
// 2. method 정의
static int add(int i, int j) {
int k = i + j;
return k;
}
public static void main(String[] args) {
// TODO Auto-generated method stub
// println
System.out.println(“test”);
// 0. String +
String a = “1”;
String b = “2”;
String c = a + b;
System.out.println(“a=” + a);
System.out.println(“b=” + b);
System.out.println(“c=” + c);
// 1. command line arguments
if (args.length == 3) {
System.out.println(args[0]);
System.out.println(args[1]);
System.out.println(args[2]);
}
// 2.1 method를 사용하지 않는다면 아래 코드 부분이 반복적으로 사용되어야 함
int i = 1; // local variable
int j = 2; // local variable
int k = i + j; // local variable
System.out.println(“i=” + i);
System.out.println(“j=” + j);
System.out.println(“k=” + k);
i = 10;
j = 20;
k = i + j;
System.out.println(“i=” + i);
System.out.println(“j=” + j);
System.out.println(“k=” + k);
i = 100;
j = 200;
k = i + j;
System.out.println(“i=” + i);
System.out.println(“j=” + j);
System.out.println(“k=” + k);
// 2.2 method 사용
int k2 = add(1, 2);
System.out.println(“k2=” + k2);
k2 = add(10, 20);
System.out.println(“k2=” + k2);
k2 = add(i, j);
System.out.println(“k2=” + k2);
// 3. class 사용
int k3 = Arithmetic.add(1, 2);
System.out.println(“k3=” + k3);
k3 = Arithmetic.add(10, 20);
System.out.println(“k3=” + k3);
k3 = Arithmetic.add(i, j);
System.out.println(“k3=” + k3);
// 4. for-loop 사용
for (int n=0; n<10; n++) {
int k4 = Arithmetic.add(n, n*2);
System.out.println(“k4[” + n + “]=” + k4);
}
// 5.1 Scanner 클래스 사용 사용자 입력
System.out.println(“두 수를 입력하여 덧셈을 합니다”);
getUserInput();
int k5 = Arithmetic.add(input1, input2);
System.out.println(“k5=” + k5);
// 5.2 do-while-loop 사용
System.out.println(“\n\n”);
do {
getUserInput();
int k6 = Arithmetic.add(input1, input2);
System.out.println(“k6=” + k6);
} while (!getUserExitKey());
// 5.3 try/catch/throws
try {
System.out.println(“두 수를 입력하여 나눗셈을 합니다”);
getUserInput();
int k7 = Arithmetic.divide(input1, input2);
System.out.println(“k7=” + k7);
} catch (ArithmeticException e) {
e.printStackTrace();
}
System.out.println(“done”);
}
}
Lab1
Lab1 – ImageConverter
Lab1_1~ Lab1_4 프로젝트 디렉토리 안에 모든 파일(src/*.java & bin/*.class)와 보고서 (2~3장)를 넣고 Lab1_학번_이름.zip 압축한 후 e-learning(http://lms.dankook.ac.kr/index.jsp)으로 제출
Lab1_1 – command line arguments
Lab1_2 – method
Lab1_3 – class
Lab1_4 – try/catch/throw & for-loop
Lab1_5 – Scanner 클래스 & do/while-loop
static boolean convert(String inputImageFile, String outputImageFile, String format) throws IOException {
// file I/O
FileInputStream inputStream = new FileInputStream(inputImageFile);
FileOutputStream outputStream = new FileOutputStream(outputImageFile);
// reads input image from file
BufferedImage inputImage = ImageIO.read(inputStream);
// writes to the output image in specified format
boolean result = ImageIO.write(inputImage, format, outputStream);
// needs to close the streams
outputStream.close();
inputStream.close();
// return result(true/false)
return result;
}
Working with Images
The Java Tutorials Lesson: Working with Images
https://docs.oracle.com/javase/tutorial/2d/images/index.html
HW0
JDK 설치
IDE 설치
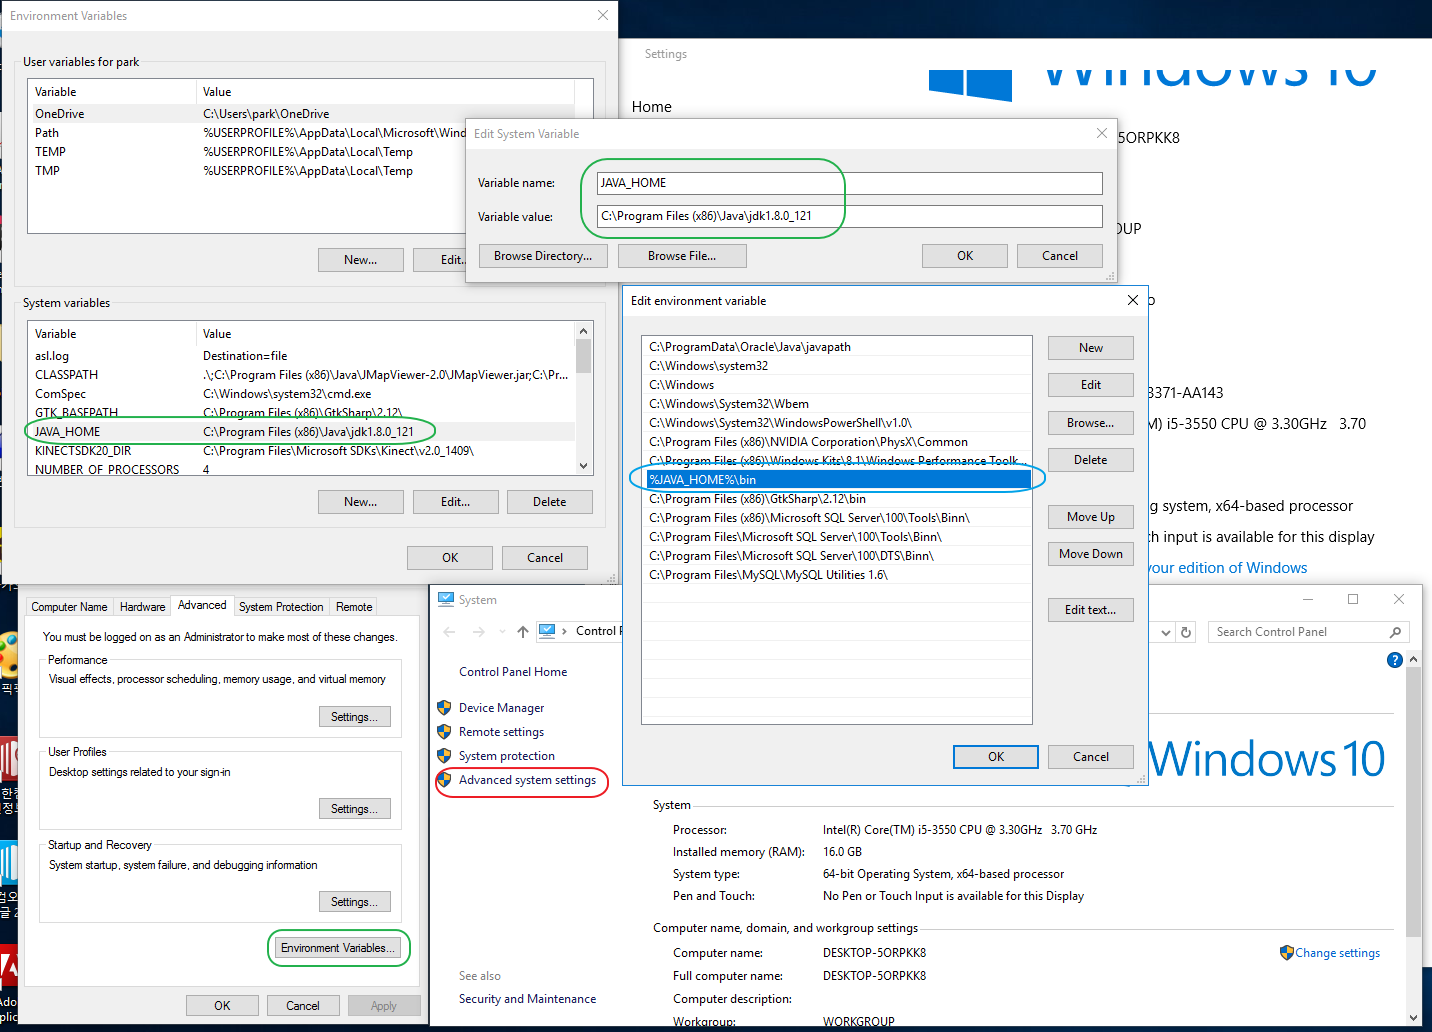
환경설정
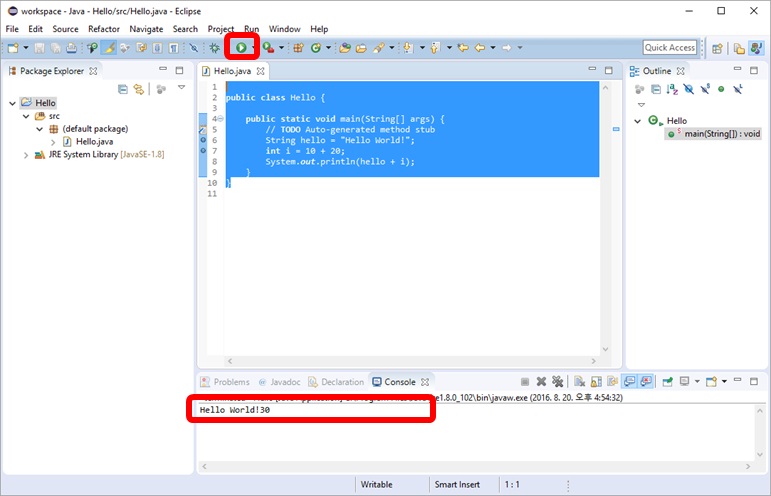
이클립스를 사용한 자바 프로그램 작성
프로젝트 디렉토리 안에 보고서 (1~2장)를 넣고 Lab0_학번_이름.zip 압축한 후 e-learning(http://lms.dankook.ac.kr/index.jsp)으로 제출
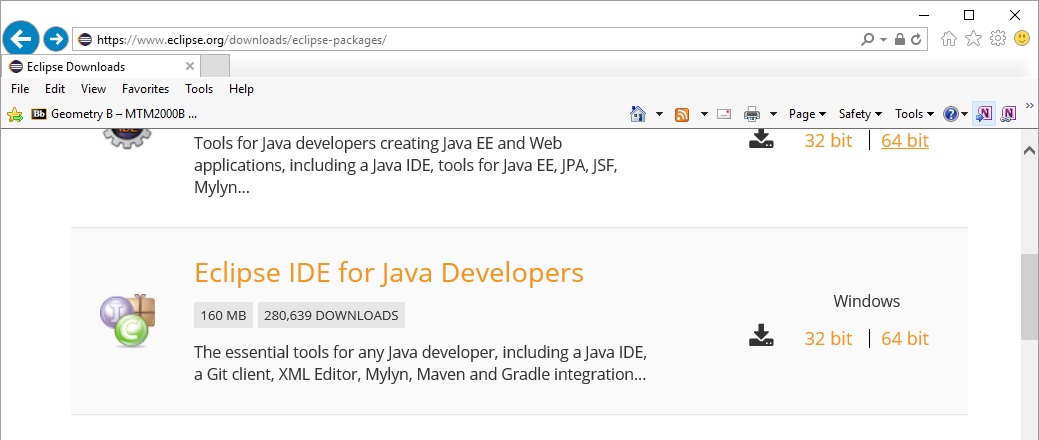
Eclipse
Eclipse Neon (eclipse-java-neon-R-win32.zip) Download
http://www.eclipse.org/downloads/
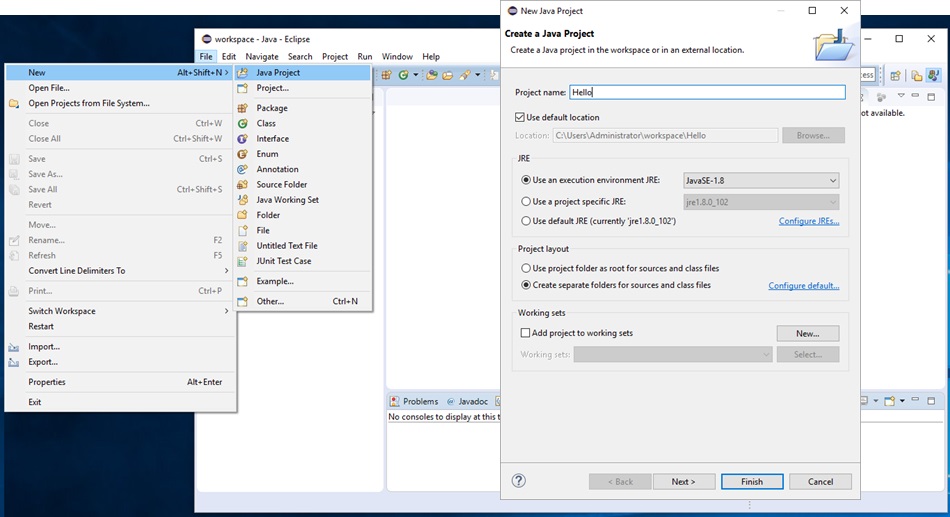
Eclipse 프로젝트 생성 File->New->Java Project
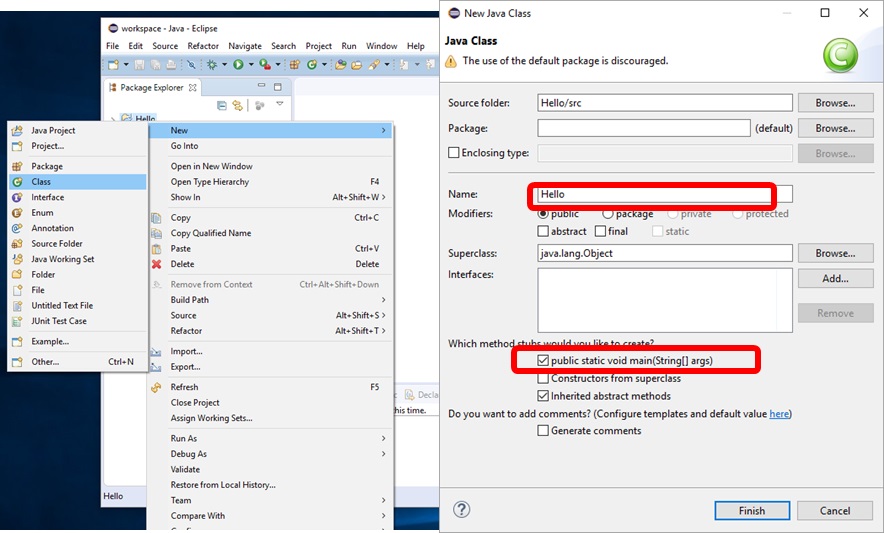
클래스 생성 File->New->Class
클래스에 코드 추가
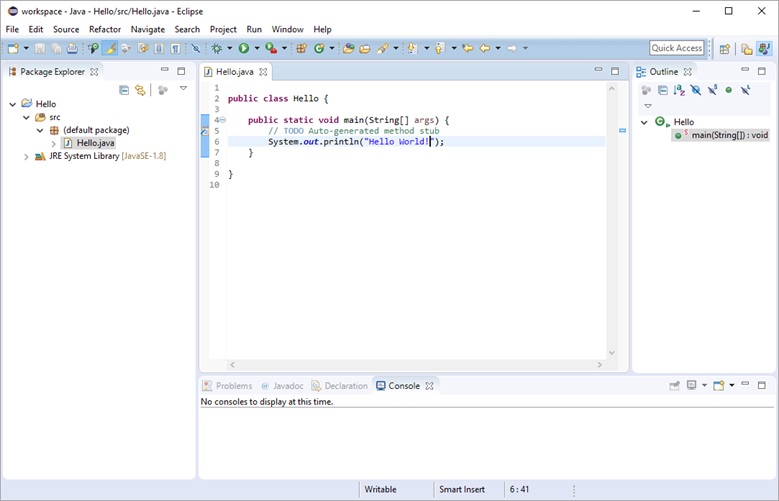
실행 Run (Ctrl+F11)
JDK1.8 8u121
Java SE 8u121 Download & JDK8 Demos and Samples Download
http://www.oracle.com/technetwork/java/javase/downloads/jdk8-downloads-2133151.html
| Windows x86 | 189.36 MB | jdk-8u121-windows-i586.exe |
| Windows x86 | 53.81 MB | jdk-8u121-windows-i586-demos.zip |
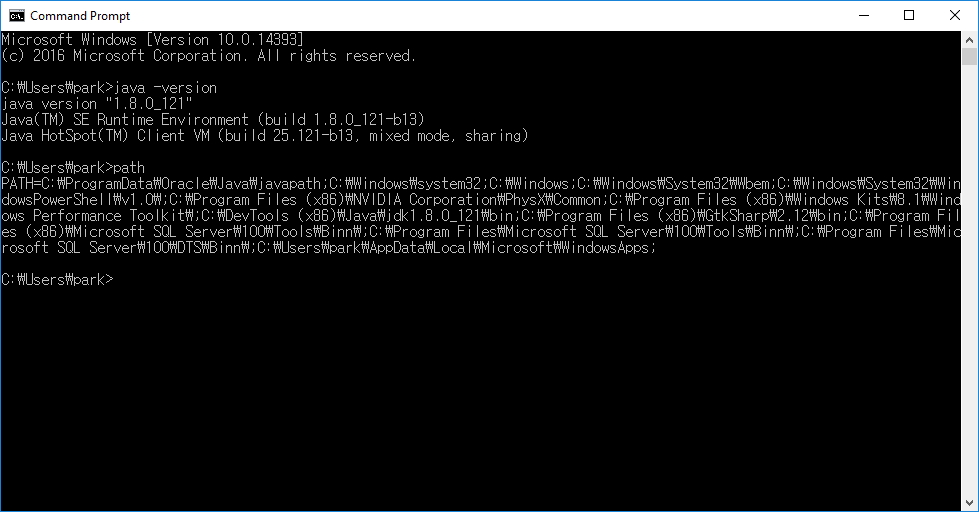
Path 지정하기
Java version 확인하기
1.Notepad 사용하여 Java 코드 작성하기 (Notepad.exe Hello.java)
public class Hello {
public static void main(String[] args) {
System.out.println(“hello”);
}
}
2.컴파일 (javac Hello.java)
3.실행 (java Hello)