simage library


COIN3D simage library (http://www.coin3d.org/lib/simage)


  • COIN3D simage가 제공하는 이미지 포멧은 JPEG, PNG, GIF, TIFF, RGB, PIC, TGA, EPS등 다양하다.
  • COIN3D의 simage library를 사용하려면, 프로젝트에 additional library and include directory를 추가해야한다. 프로젝트 폴더 안에 include 와 lib 디렉토리를 생성하고 simage.h 과 simage1d.lib를 복사한다.
  • 그리고, 프로젝트에 simage1.lib 라이브러리를 링크한다.


simage include와 library directory 추가, 라이브러리 링크

Project->Properties(ALT+F7)->Configuration Properties->C/C++->General에
Additional Include Directories에 ./include를 넣는다.

Project->Properties(ALT+F7)->Configuration Properties->C/C++->Preprocessor에 Preprocessor Definitions에 ;SIMAGE_DLL를 추가한다.

Project->Properties(ALT+F7)->Configuration Properties->Linker->General에
Additional Library Directories에 ./lib/debug를 넣는다.

Project->Properties(ALT+F7)->Configuration Properties->Linker->Input에
Additional Dependencies에 simage1.lib을 추가한다.
OpenAL Getting Started

OpenAL http://www.openal.org/

1. Download OpenAL 1.1 SDK & Installer for Windows and install them


  • OpenAL 1.1 SDK for Windows

  • OpenAL 1.1 Installer for Windows 

    2. Set environment variables


    • Go to Control panel -> System icon -> Advanced tab -> Environment variables
    • Create a new variable called “OAL_ROOT” and set the value “C:\Program Files\OpenAL 1.1 SDK” for Visual Studio .Net 2010

    3. In Visual Studio .Net 2010


    • Configuration Properties -> C/C++ -> General -> Additional Include Directories “$(OAL_ROOT)\include” 추가
    • Configuration Properties -> Linker -> General -> Additional Library Directories “$(OAL_ROOT)\libs\Win32” 추가
    • Configuration Properties -> Linker -> Input -> Additional Dependencies “OpenAL32.lib” 추가
  • HW2

    그래픽스 프로그래밍(321190) 실습 #2
    – 3D graphics & hierarchical transformation & shading
    (321190)
    강사: 박경신
    2013년 5월 9일7836815763.hwp

    제출 방법: 2013년 5월 27일(월) 밤12시까지
    (e-learning 강의실에 실행파일과 소스코드와 리포트를 전부 “학번이름_숙제2.zip”으로 묶어서 제출하도록 합니다. 또한, 소스코트 폴더에 .cpp만 담지 말고 비주얼 스튜디오에서 만든 프로젝트 폴더를 담기 바랍니다.)


    참고자료: moglclass-shaded.zip


    0. Display window 크기는 1000 x 1000로 한다.


    1. Hierarchical transformation 구조를 가진 ‘모빌‘을 만든다. (30점)
    -Geometry 예제 (circle, cube, cylinder, sphere, square)와 Transformation 예제 (car, orbit, planet, robot, simple solar system)를 참고하여 본인만의 ‘모빌 (모빌의 내부 구성은 창의적으로)’를 구성하여 만든다.
    -‘모빌’은 적어도 5개 이상의 3차원 물체 (예를 들어, 별, 달, 눈송이, 귀염둥이 인형, 등등)가 달려있다. (보고서에 모빌 스케치 첨부할 것)
    -‘모빌’에 붙어있는 물체의 위치는 균형(balance)를 고려해서 안정적으로 보이도록 한다.
    -‘모빌’ 물체는 적어도 2간계 이상의 계층적 구조를 갖는다.


    2. ‘Space bar’-key를 누르면 ‘모빌’이 움직이거나/멈춘다. (20점)
    -‘space bar’-key는 ‘모빌’을 움직이거나 멈추게 하는 toggle button이다.
    -움직이는 모드에서는 ‘모빌’이 천천히 좌우로 움직이거나 회전을 한다. – 힌트: Idel() 함수를 사용할 것.
    -가능하다면, 2단계 이상의 계층적 구조의 (즉, 부분적으로 다른) 움직임을 ‘모빌’ 물체에 적용하도록 한다.


    3. 전체적인 장면에 조명과 재질을 사용하여 3차원 장면의 사실감을 더한다. (10점)


    4. ‘모빌’의 모양을 곡선과 곡면을 사용하여 디자인하거나, ‘모빌’의 3차원 물체 중에 하나는 창의적으로 본인이 직접 정점의 정보 (Vertex Position과 Normal)을 지정해서 만들어 본다. (10점)


    5. 창의성, 소스코드 주석처리, 리포트 (30점)

    Camera Movement

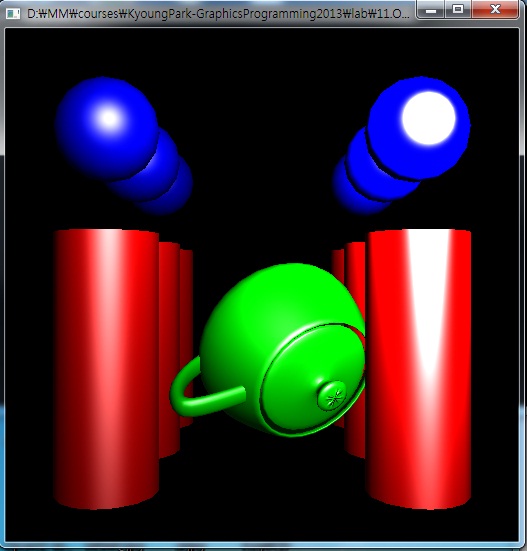
    7253740286.cppcamera class를 사용하여 x/y/x축 카메라의 위치이동과 x/y/x축 카메라의 방향이동
    F1&F2 – x축 카메라 위치이동
    F3&F4 – y축 카메라 위치이동
    F5&F6 – z축 카메라 위치이동
    F7&F8 – x축 카메라 방향이동 (PITCH)
    F9&F10 – y축 카메라 방향이동 (YAW)
    HOME&END – z축 카메라 방향이동 (ROLL)


    // main.cpp ——————————————
    Camera camera1(FLY);

    void init( void )
    {
    // 중간생략..
     View = camera1.lookAt(g_eye, g_at, g_up);

    }

    void display( void )
    {

    // 중간생략..
     View = camera1.View();

    }

    void specialkey(int key, int x, int y)
    {
     if (key == GLUT_KEY_F1)   // x-movement
            camera1.strafe(0.5);
     else if (key == GLUT_KEY_F2)
            camera1.strafe(-0.5);
     else if (key == GLUT_KEY_F3) // y-movement
            camera1.fly(0.5);
     else if (key == GLUT_KEY_F4)
            camera1.fly(-0.5);
     else if (key == GLUT_KEY_F5) // z-movement
            camera1.walk(0.5);
        else if (key == GLUT_KEY_F6)
            camera1.walk(-0.5);


     else if (key == GLUT_KEY_F7) // yaw (by y-axis)
            camera1.yaw(2.5);
     else if (key == GLUT_KEY_F8)
            camera1.yaw(-2.5);
     else if (key == GLUT_KEY_F9) // pitch (by x-axis)
            camera1.pitch(2.5);
        else if (key == GLUT_KEY_F10)
            camera1.pitch(-2.5);
     else if (key == GLUT_KEY_HOME) // roll (by z-axis)
            camera1.roll(2.5);
        else if (key == GLUT_KEY_END)
            camera1.roll(-2.5);


     else if (key == GLUT_KEY_LEFT) // same as town
            camera1.yaw(2.5);
     else if (key == GLUT_KEY_RIGHT)
            camera1.yaw(-2.5);
     else if (key == GLUT_KEY_UP)
            camera1.walk(0.5);
        else if (key == GLUT_KEY_DOWN)
            camera1.walk(-0.5);


     glutPostRedisplay();
    }


    http://dis.dankook.ac.kr/lectures/cg12/entry/OpenGL-Camera